
GoNut
Capstone Project
Duration: 2021-2022; 9 months
Role: Art Lead in an interdisciplinary team of 8 - 1 team lead, 1 engineering lead, 1 art lead, 3 engineers, 2 artists
Skills: project management, UX research, interaction design, sewing


Details
Overview
WHY GoNut was needed?
A large number of children today are confronted with severe motor impairments caused by various factors, such as genetic diseases, injuries, and trauma. The most common motor disability in childhood is cerebral palsy(CP), which includes any weaknesses or problems using muscles caused by abnormal brain development. According to the Centers for Disease Control and Prevention(CDC), around 10,000 newborns may suffer from CP just in 2020 in the US alone. Children with motor impairments, due to their limited ability to move, have limited awareness of space and autonomic control. This negatively impacts their use of power wheelchairs and therefore their well-being in the future. California Child Services(CCS) currently executes therapy sessions for their patients to develop their sense of navigation and autonomy by helping them to move under the support of therapists. There have been multiple cases proving that these training sessions at CCS improve the patients’ autonomic navigation and even the physical state of their muscles.
WHAT was GoNut?
GoNut was a cause-and-effect vehicle that assisted the therapy. It was be specifically designed to be used in the therapy sessions for children from 0 to 6 years old with motor impairments in the therapy space of CCS. It was an aesthetically pleasing vehicle controlled by button panel(s) with multiple buttons. Each button was associated with one movement. The movement will be generated as a button was pressed by the user. Therefore, ideally, as the patients play with the vehicle and move in the therapy space on their own, their spatial awareness would be improved, and they would develop a connection between movements of muscles and movements in space.
HOW was it made?
A fully functional vehicle was built by an interdisciplinary team of eight UC Santa Barbara(UCSB) undergraduate students from the mechanical engineering and the art department. There will be one project manager, one engineering lead, one art lead, three engineers, and two artists. A professor from the mechanical engineering department acted as an advisor to provide guidance. The project was sponsored by CCS.
Stakeholder Analysis

Needs Analysis

Risk Analysis

Making Process


Artists spray painted the donut bumper prototype.
Engineer and artist worked on the button panel .
The process of building the oval donut prototype.
My Focused Prototypes
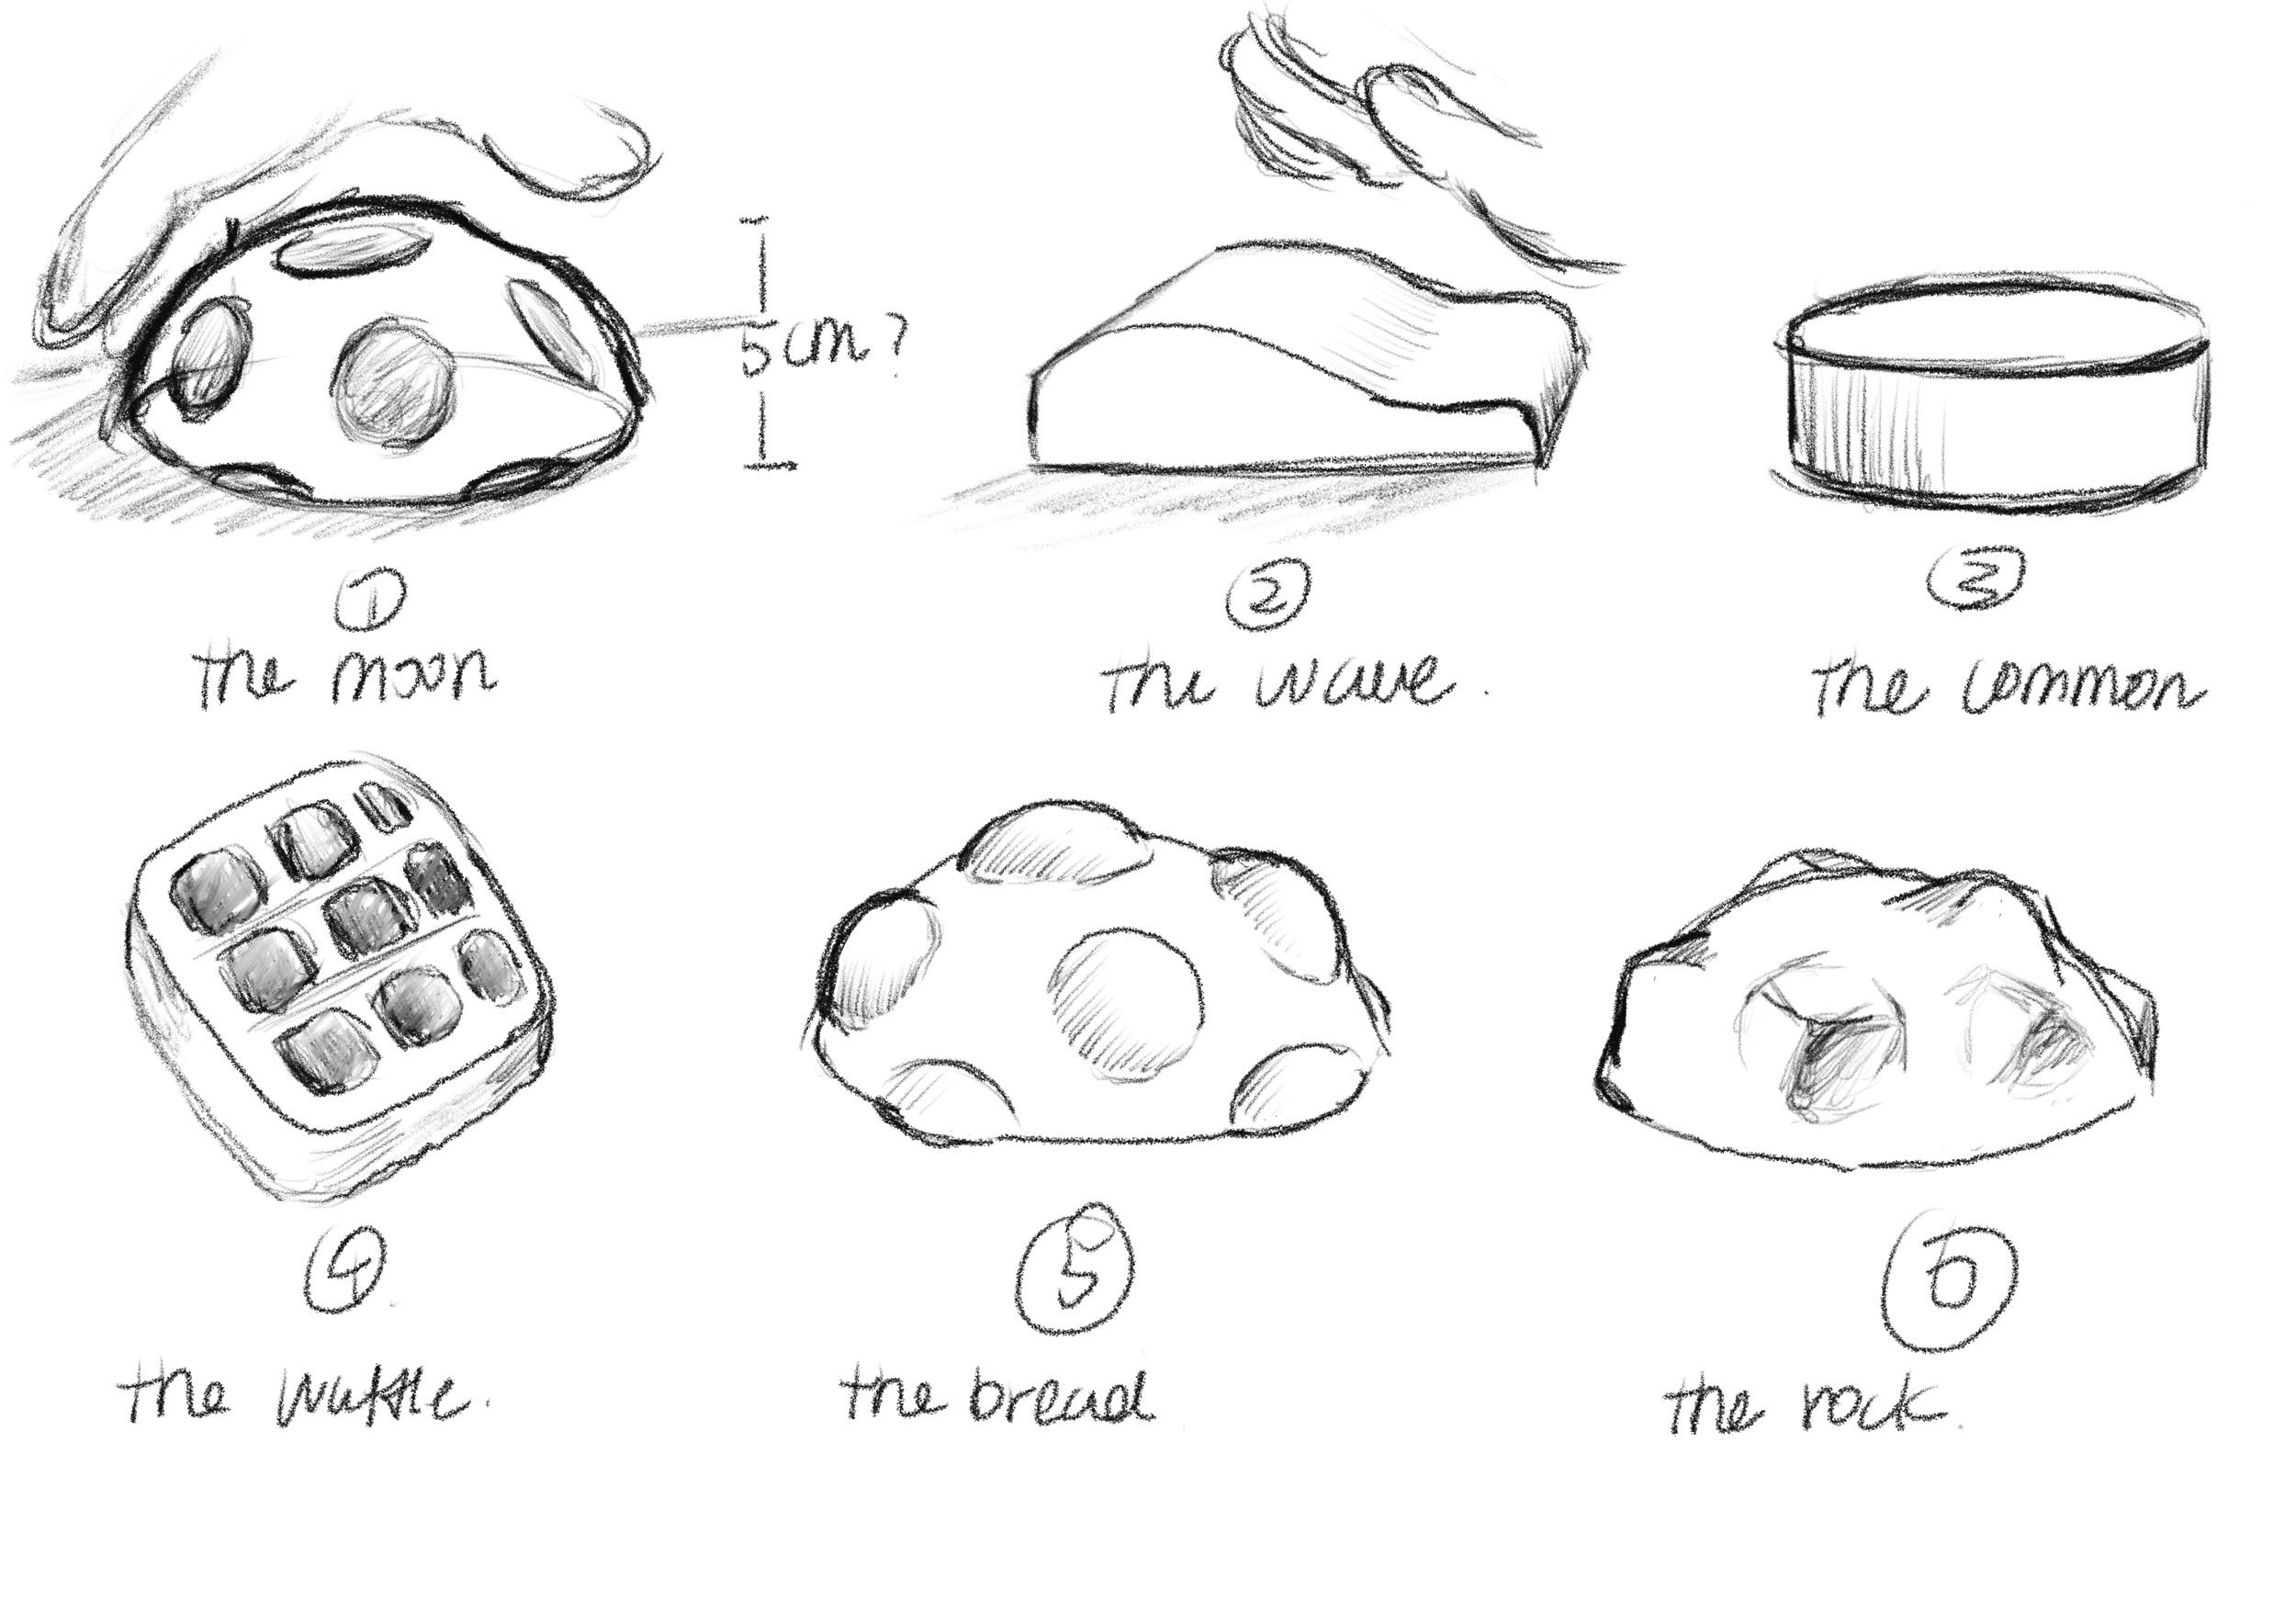
1. The Donut Bumper


1. Concept Sketch: A model was sketched in Blender to illustrate the idea of making the bumper
The bumper served for safety purpose. It protected children from hitting on the walls or other obstacles when the proximity sensor failed to work. The team decided to make the bumper into a donut to make the device more engaging. Through observation, domain survey and testing, the team found children love chocolate donut. Moreover, chocolate donut has a relatively gender neutral color palette, which avoided the possibility of children refusing to sit on the vehicle because it looked too “girlish” or “boyish” at its best. Rainbow-colored sprinkles were decorated on the donut. The visual system of children from 0 to 4 years old is not fully developed yet, which made them more sensitive to bright and contrasting colors. The saturated and highly contrasting could attract their attention effectively.
2. Preliminary Prototype: A preliminary prototype was made with plywood and cardboards painted with acrylic to show how the bumper looked like.

3. A Failed Prototype: The donut bumper was made with a plywood skeleton wrapped with pool floats. The donut appearance was achieved with spray paint. Yet this turned out to be a failed prototype due to the following reasons: (1) the donut was too heavy to be lifted up by the therapists; (2) it had a tilting issue; (3) the spray paints gave off strong hazardous smell.

4. Final Prototype: The donut bumper was made with plastic pipes and rug pad. The cover contributing to the donut appearance was made with waterproof nylon fabric. This prototype had the following features: (1) the front half could be taken out, making it easier to put a child on the vehicle; (2) light weighted; (3) the cover could be easily open and close with the snap fasteners, and could be washed or wiped.


2. Button Panel
A button panel with at least five buttons were required to control the movement of the vehicle with each button associated with one movement. The interface must be simple enough for children to play with. There must be sufficient distance between buttons to reduce the probability of children pressing two buttons at the same time.


1. Concept Sketch: The button panel was initially designed to have a simple interface with 4 buttons corresponding to forward, backward, right, and left movements respectively. The corners were rounded for safety
2. The Round Panel: The round panel prototype satisfied the requirement for safety and movements, but we decided to add a spin movement, and this panel design would then not allow sufficient distance between buttons.
3. Square Panel with Rounded Corners: This design satisfied the distance requirement, but the children could take off the button caps easily by inserting fingers into the gap between the caps and the panel.


4. Final Prototype & Recess for Caps: The final prototype was a square panels with 4 buttons for 5 movements. The distance between buttons were 15cm, which should be sufficient. All corners were rounded. A recess feature was added so that there was no way children could flip the caps by inserting fingers into the gaps. The caps could only be pulled out by adults.
3. Button Caps

More than 20 button caps of various colors and textures were made through 3D printing. The button caps were swappable by simply snapping on and off the buttons on the panel, which allowed it to satisfy the needs of different children.


1. Concept Sketch: Button caps should be in diverse colors, shapes and textures. Highly saturated colors were applied and highly contrasting colored button caps should be put right next to each other to align with the developing visual system of 0-4 years old children. Diverse textures were designed for children with visual impairment.


2. Button Caps: More than 20 button caps were produced through 3D printing. Animal-shaped toys were also incorporated as we noticed the children were very engaged with animal toys during our observation.
